dKargo Docs
dKargo.ioWhitepaper
Docs ENG
Docs ENG
  • Welcome to dKargo
  • Run dKargo Node
    • Chain RPC
    • Installation Guide
    • Types of Chain Node
    • Full Node
    • Archive Full Node
    • Validator Node
  • Wallet Setup
    • Connectiong to MetaMask
    • Creating a wallet
    • Importing a Wallet
    • Adding the dKargo Network
  • Validator Operations
    • Validator Staking
    • Staking
    • Unstaking
    • Claim
  • Deploy Contract
    • How to deploy a contract
    • Deploying a Contract Using Remix-IDE
    • Deploying a Contract Using Hardhat
    • Deploying a Contract Using Foundry
  • ERC-20 BRIDGING
    • ERC-20 Bridging
    • Standard Gateway
    • Generic-custom Gateway
    • Custom Gateway
  • DKA Bridging
    • DKA Bridging
    • DKA Deposit
    • DKA Withdraw
  • Faucet
    • Faucet for Testnet Tokens
    • Claiming Testnet Tokens
  • Chain Snapshot
    • Download the Latest Chain Snapshot
  • Contract Address
    • Contract Address List
  • Bug Bounty
    • Bug Bounty Program
Powered by GitBook
On this page
  • STEP 1 - Getting Started with Remix
  • STEP 2 - Deploying the Contract
  • STEP 3 - Interacting with the Contract
  1. Deploy Contract

Deploying a Contract Using Remix-IDE

PreviousHow to deploy a contractNextDeploying a Contract Using Hardhat

Last updated 2 months ago

Remix Project is a development tool that provides developers with the necessary technologies and features for the entire smart contract development process. It also serves as an educational platform for learning and experimenting with Ethereum.

When deploying a contract on any blockchain, the native token of that chain must be used to pay for deployment gas fees. This applies to dKargo Chain as well. Before deploying on the dKargo testnet (Warehouse), developers can obtain $DKA testnet tokens via the faucet. Remix interacts with the blockchain using the wallet registered in .

STEP 1 - Getting Started with Remix

  1. Access and navigate to File Explorer, then click ≡ (menu icon). Select [ + Create Blank ] to create a new Workspace.

  2. Create a new file named counter.sol and enter the contract code or use the provided sample code.

// SPDX-License-Identifier: MIT
pragma solidity ^0.8.0;
 
contract Counter {
    uint256 public number;
 
    function setNumber(uint256 newNumber) public {
        number = newNumber;
    }
 
    function increment() public {
        number++;
    }
}
  1. Go to the [ Solidity Compile ] sidebar option and select counter.sol to compile the contract.

STEP 2 - Deploying the Contract

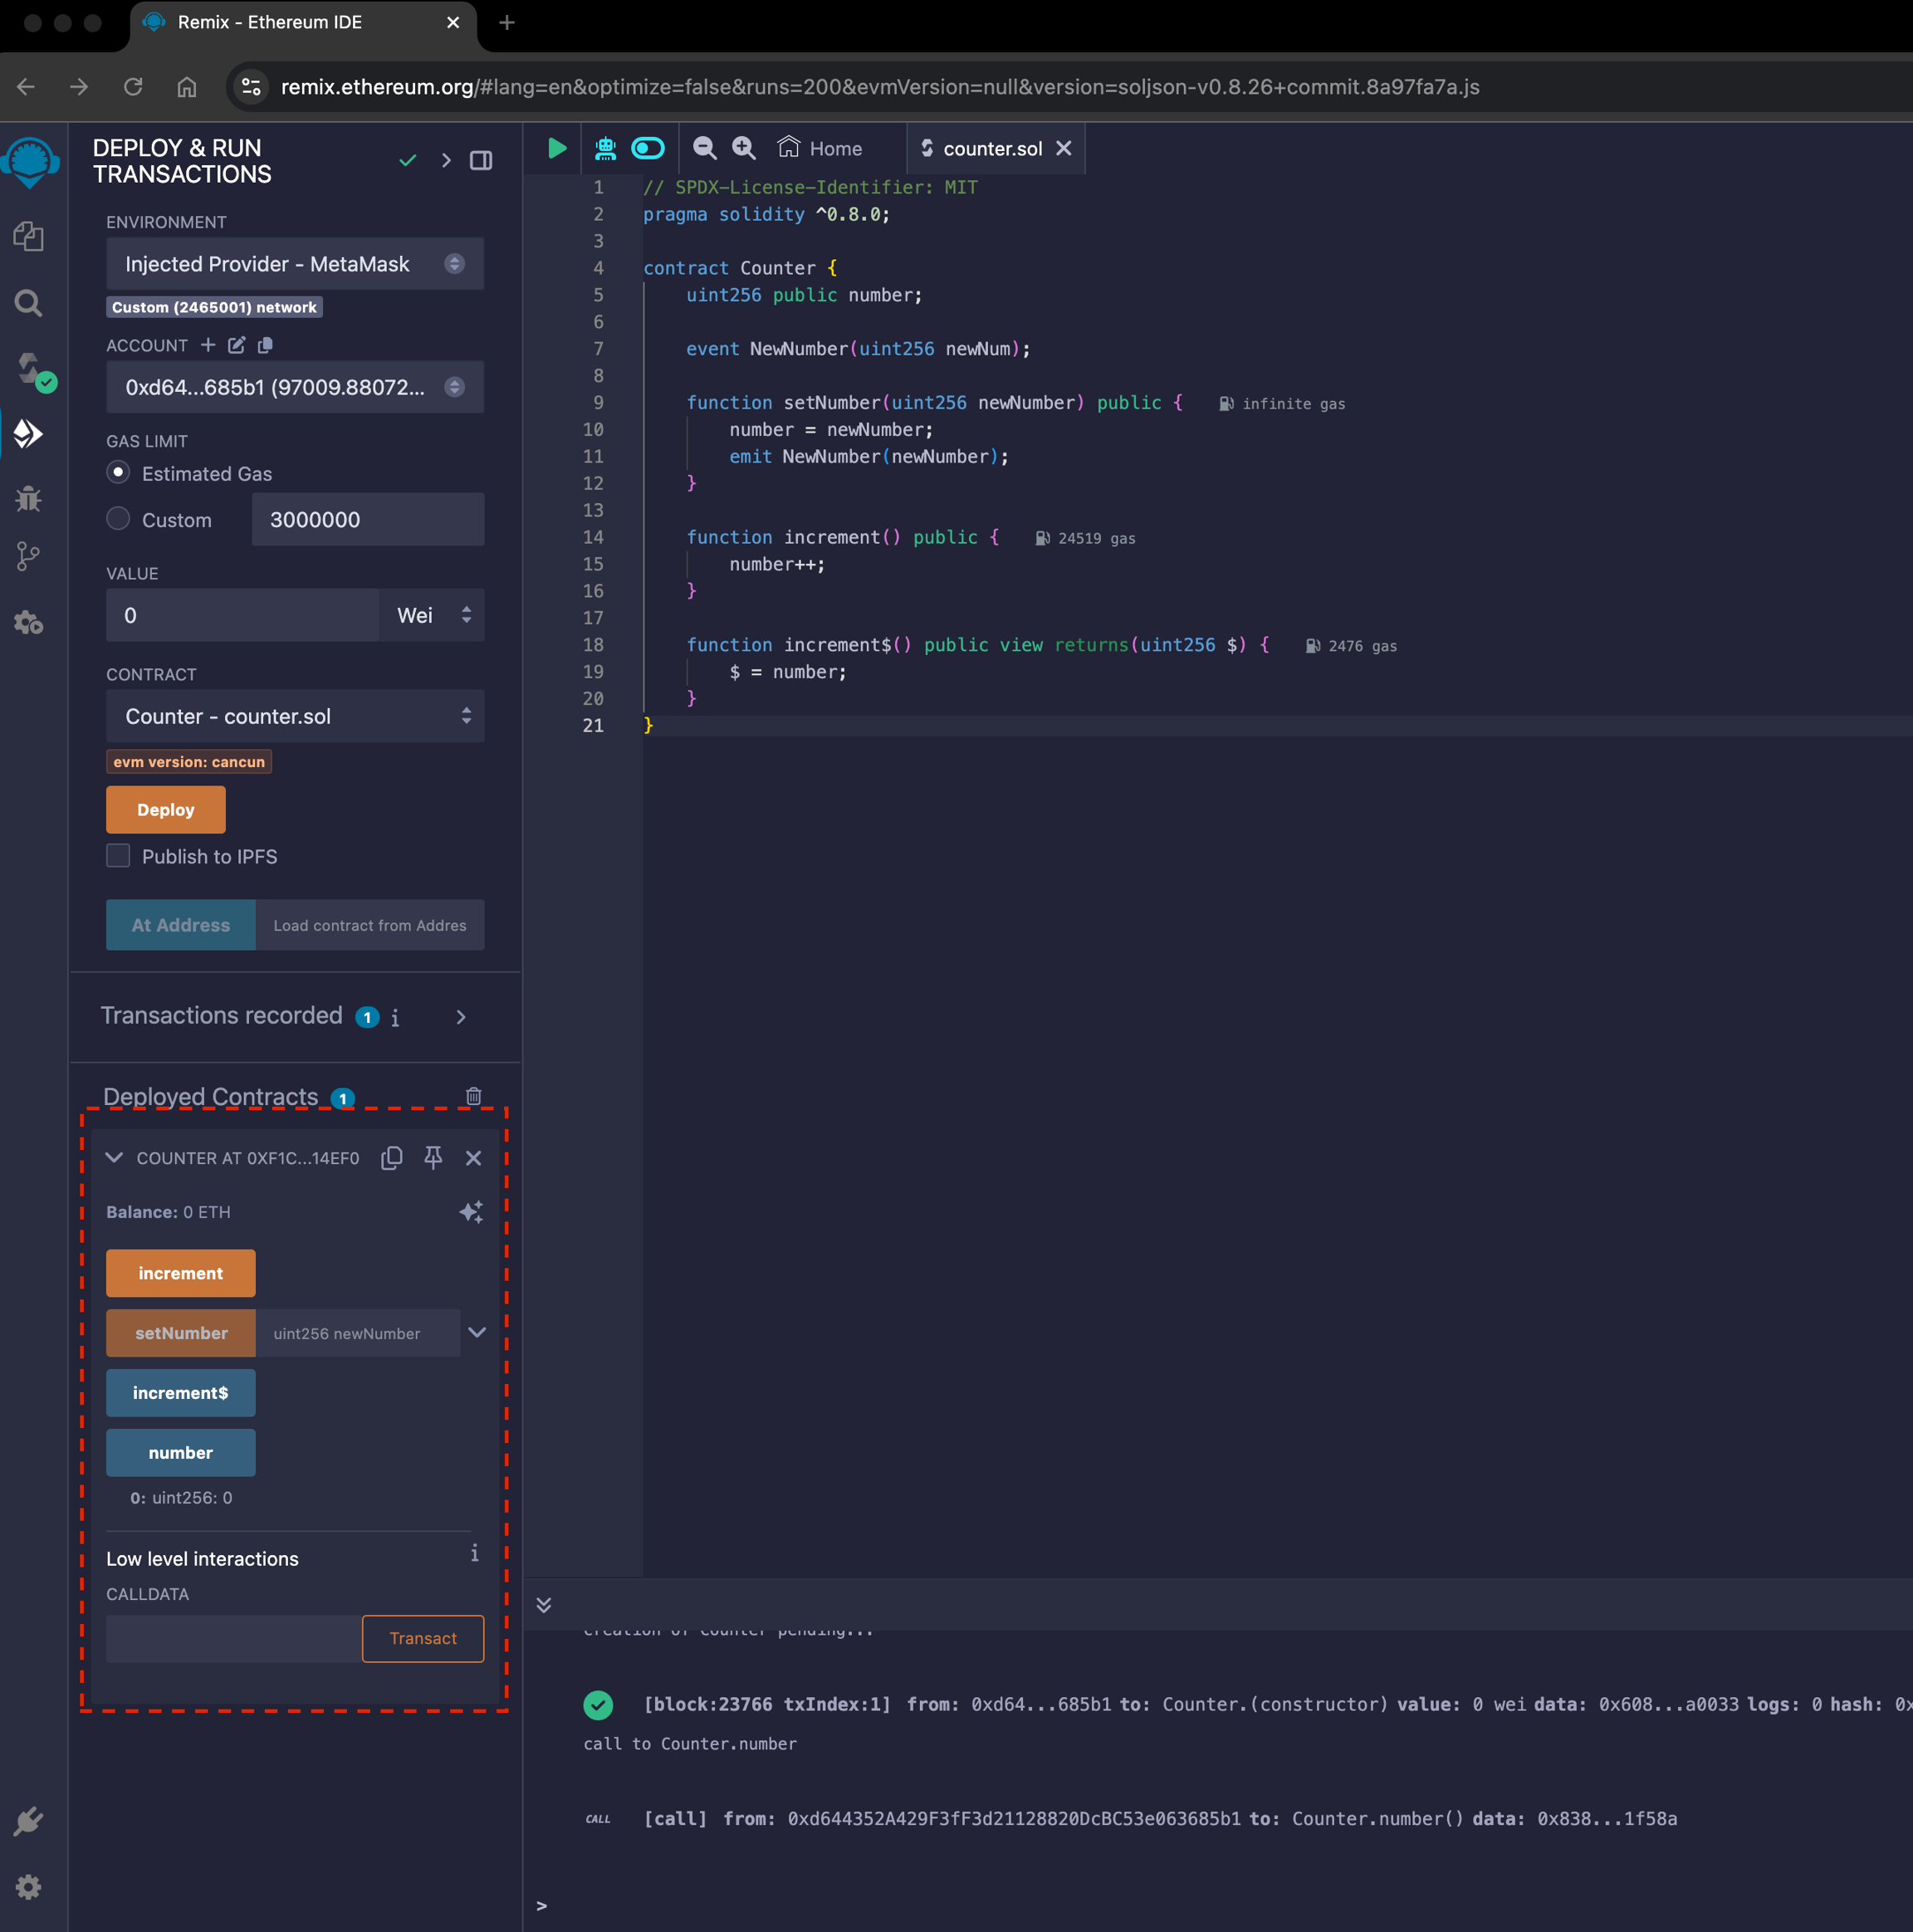
  1. Navigate to the [ Deploy & Run Transactions ] sidebar option.

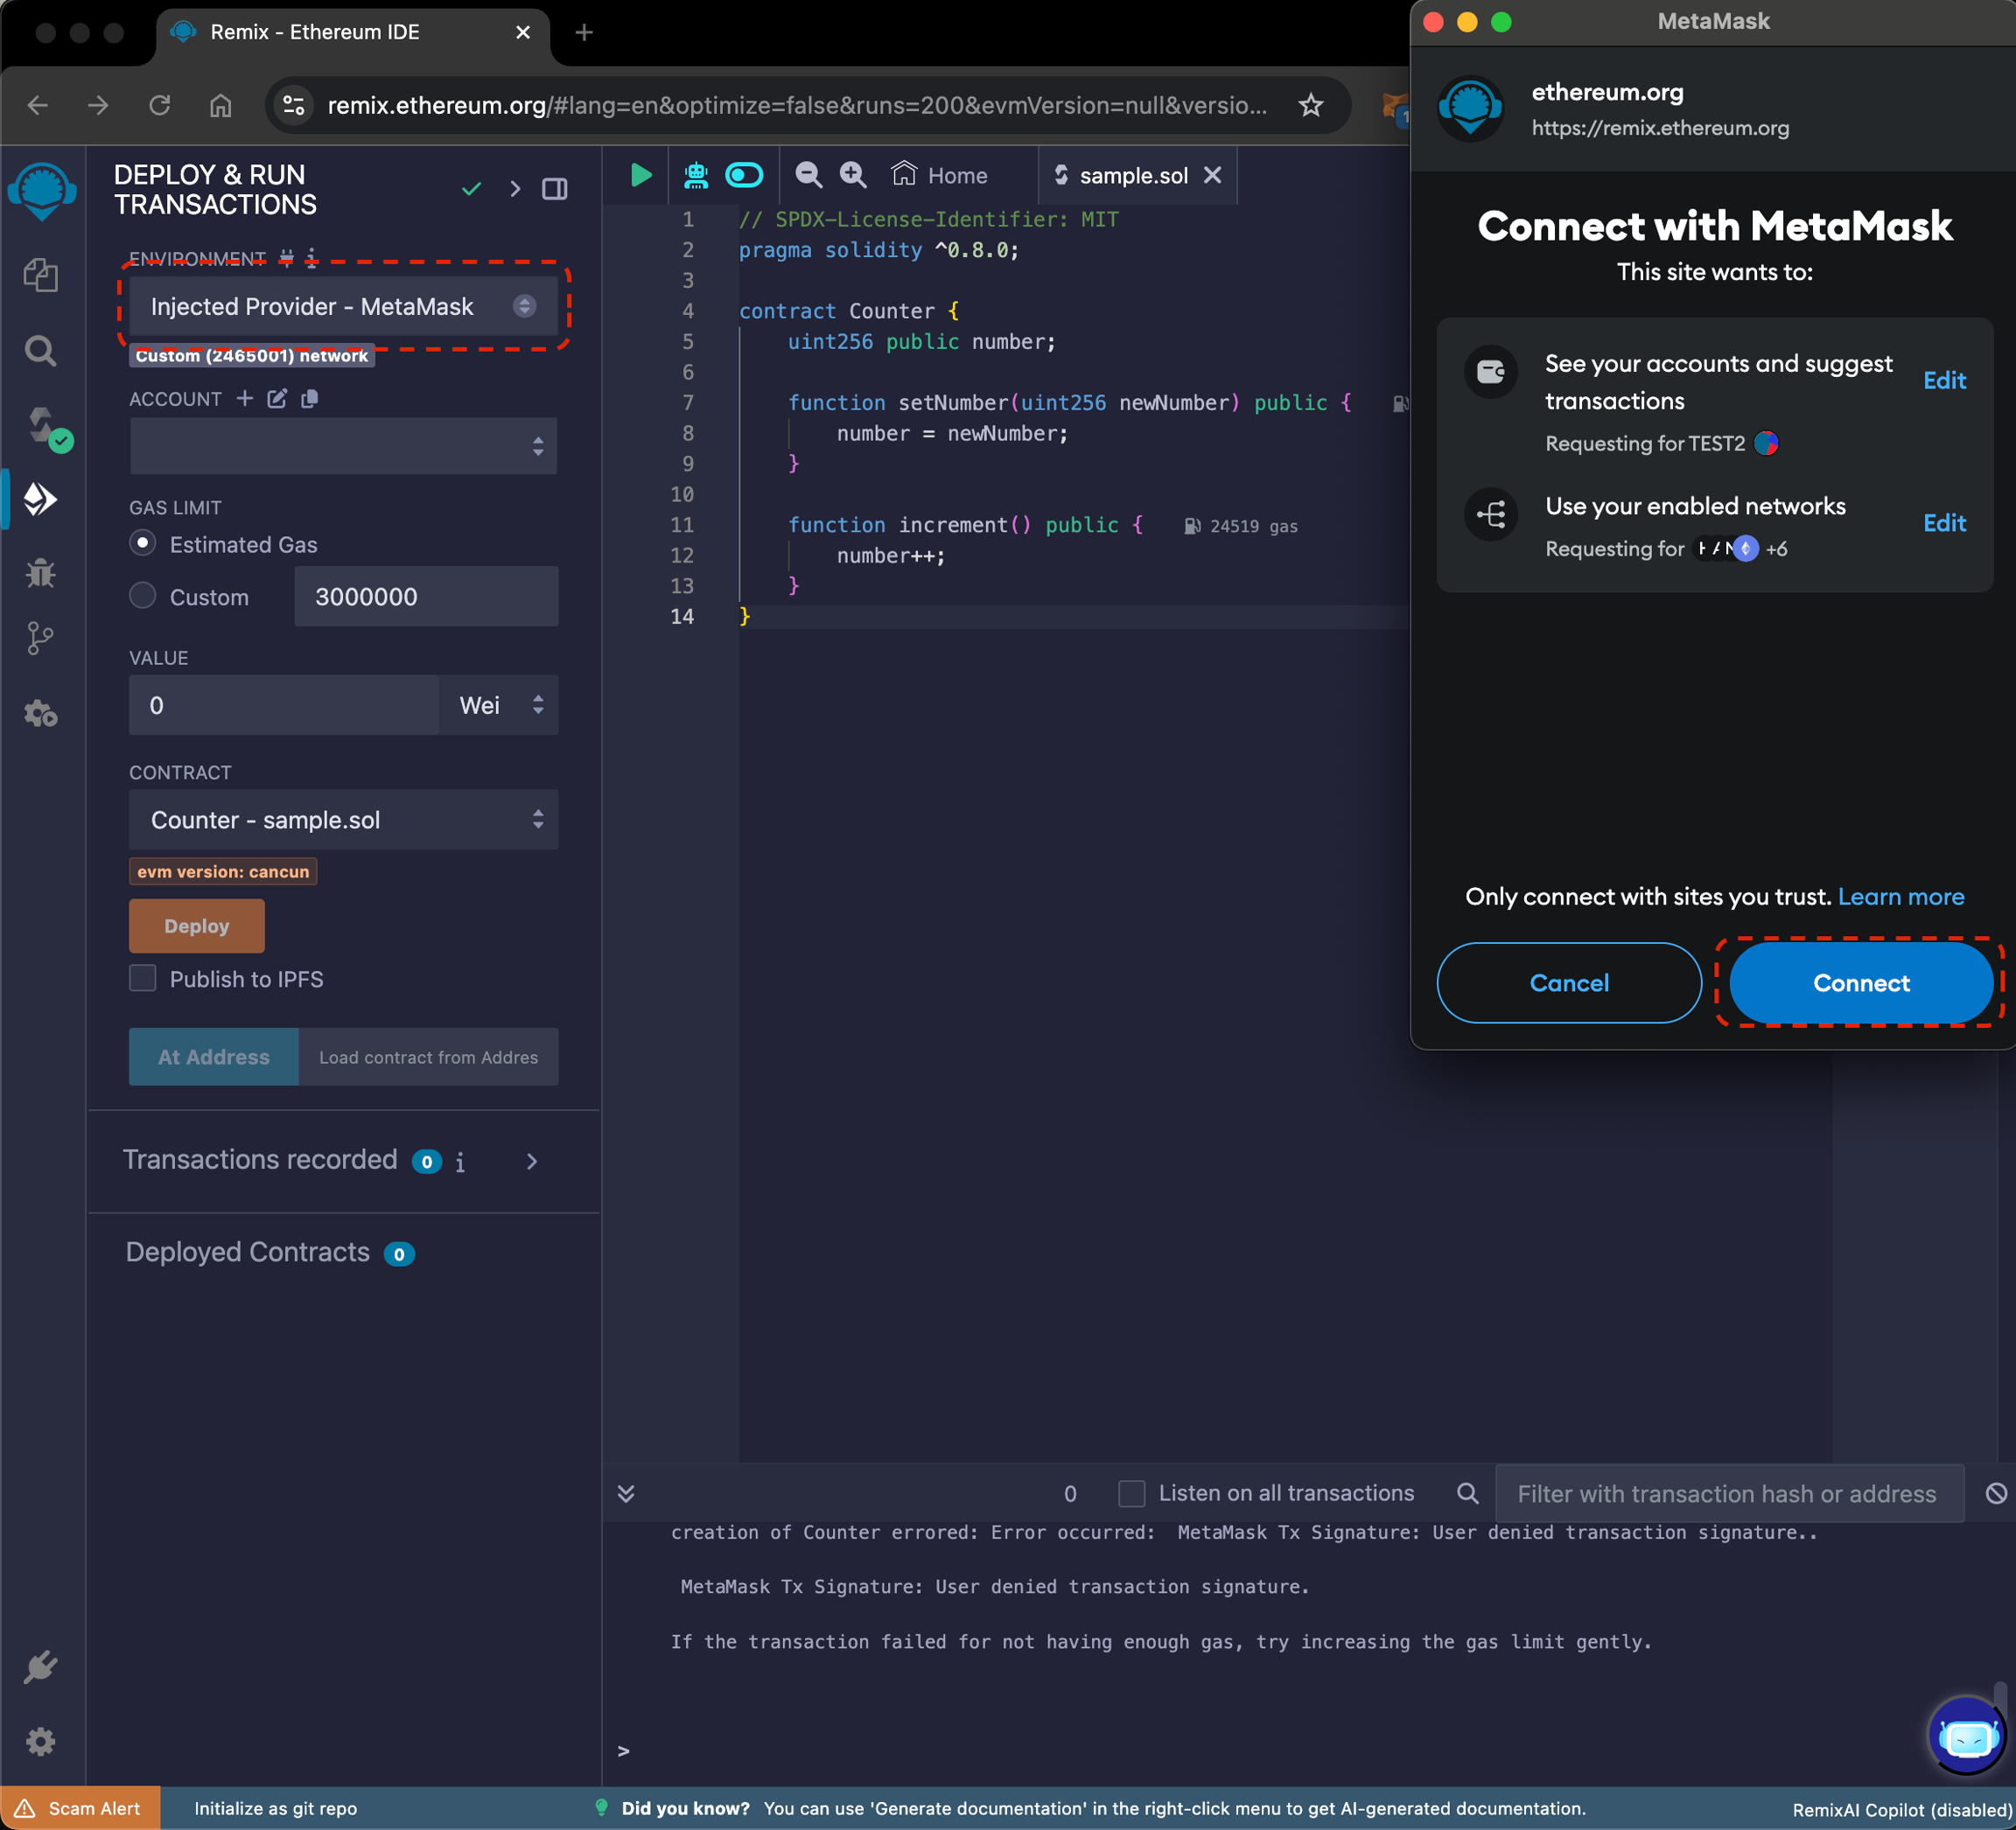
  2. Change the ENVIRONMENT dropdown to "Injected Provider - MetaMask".

  3. In MetaMask, click [ Connect ] to grant Remix access.

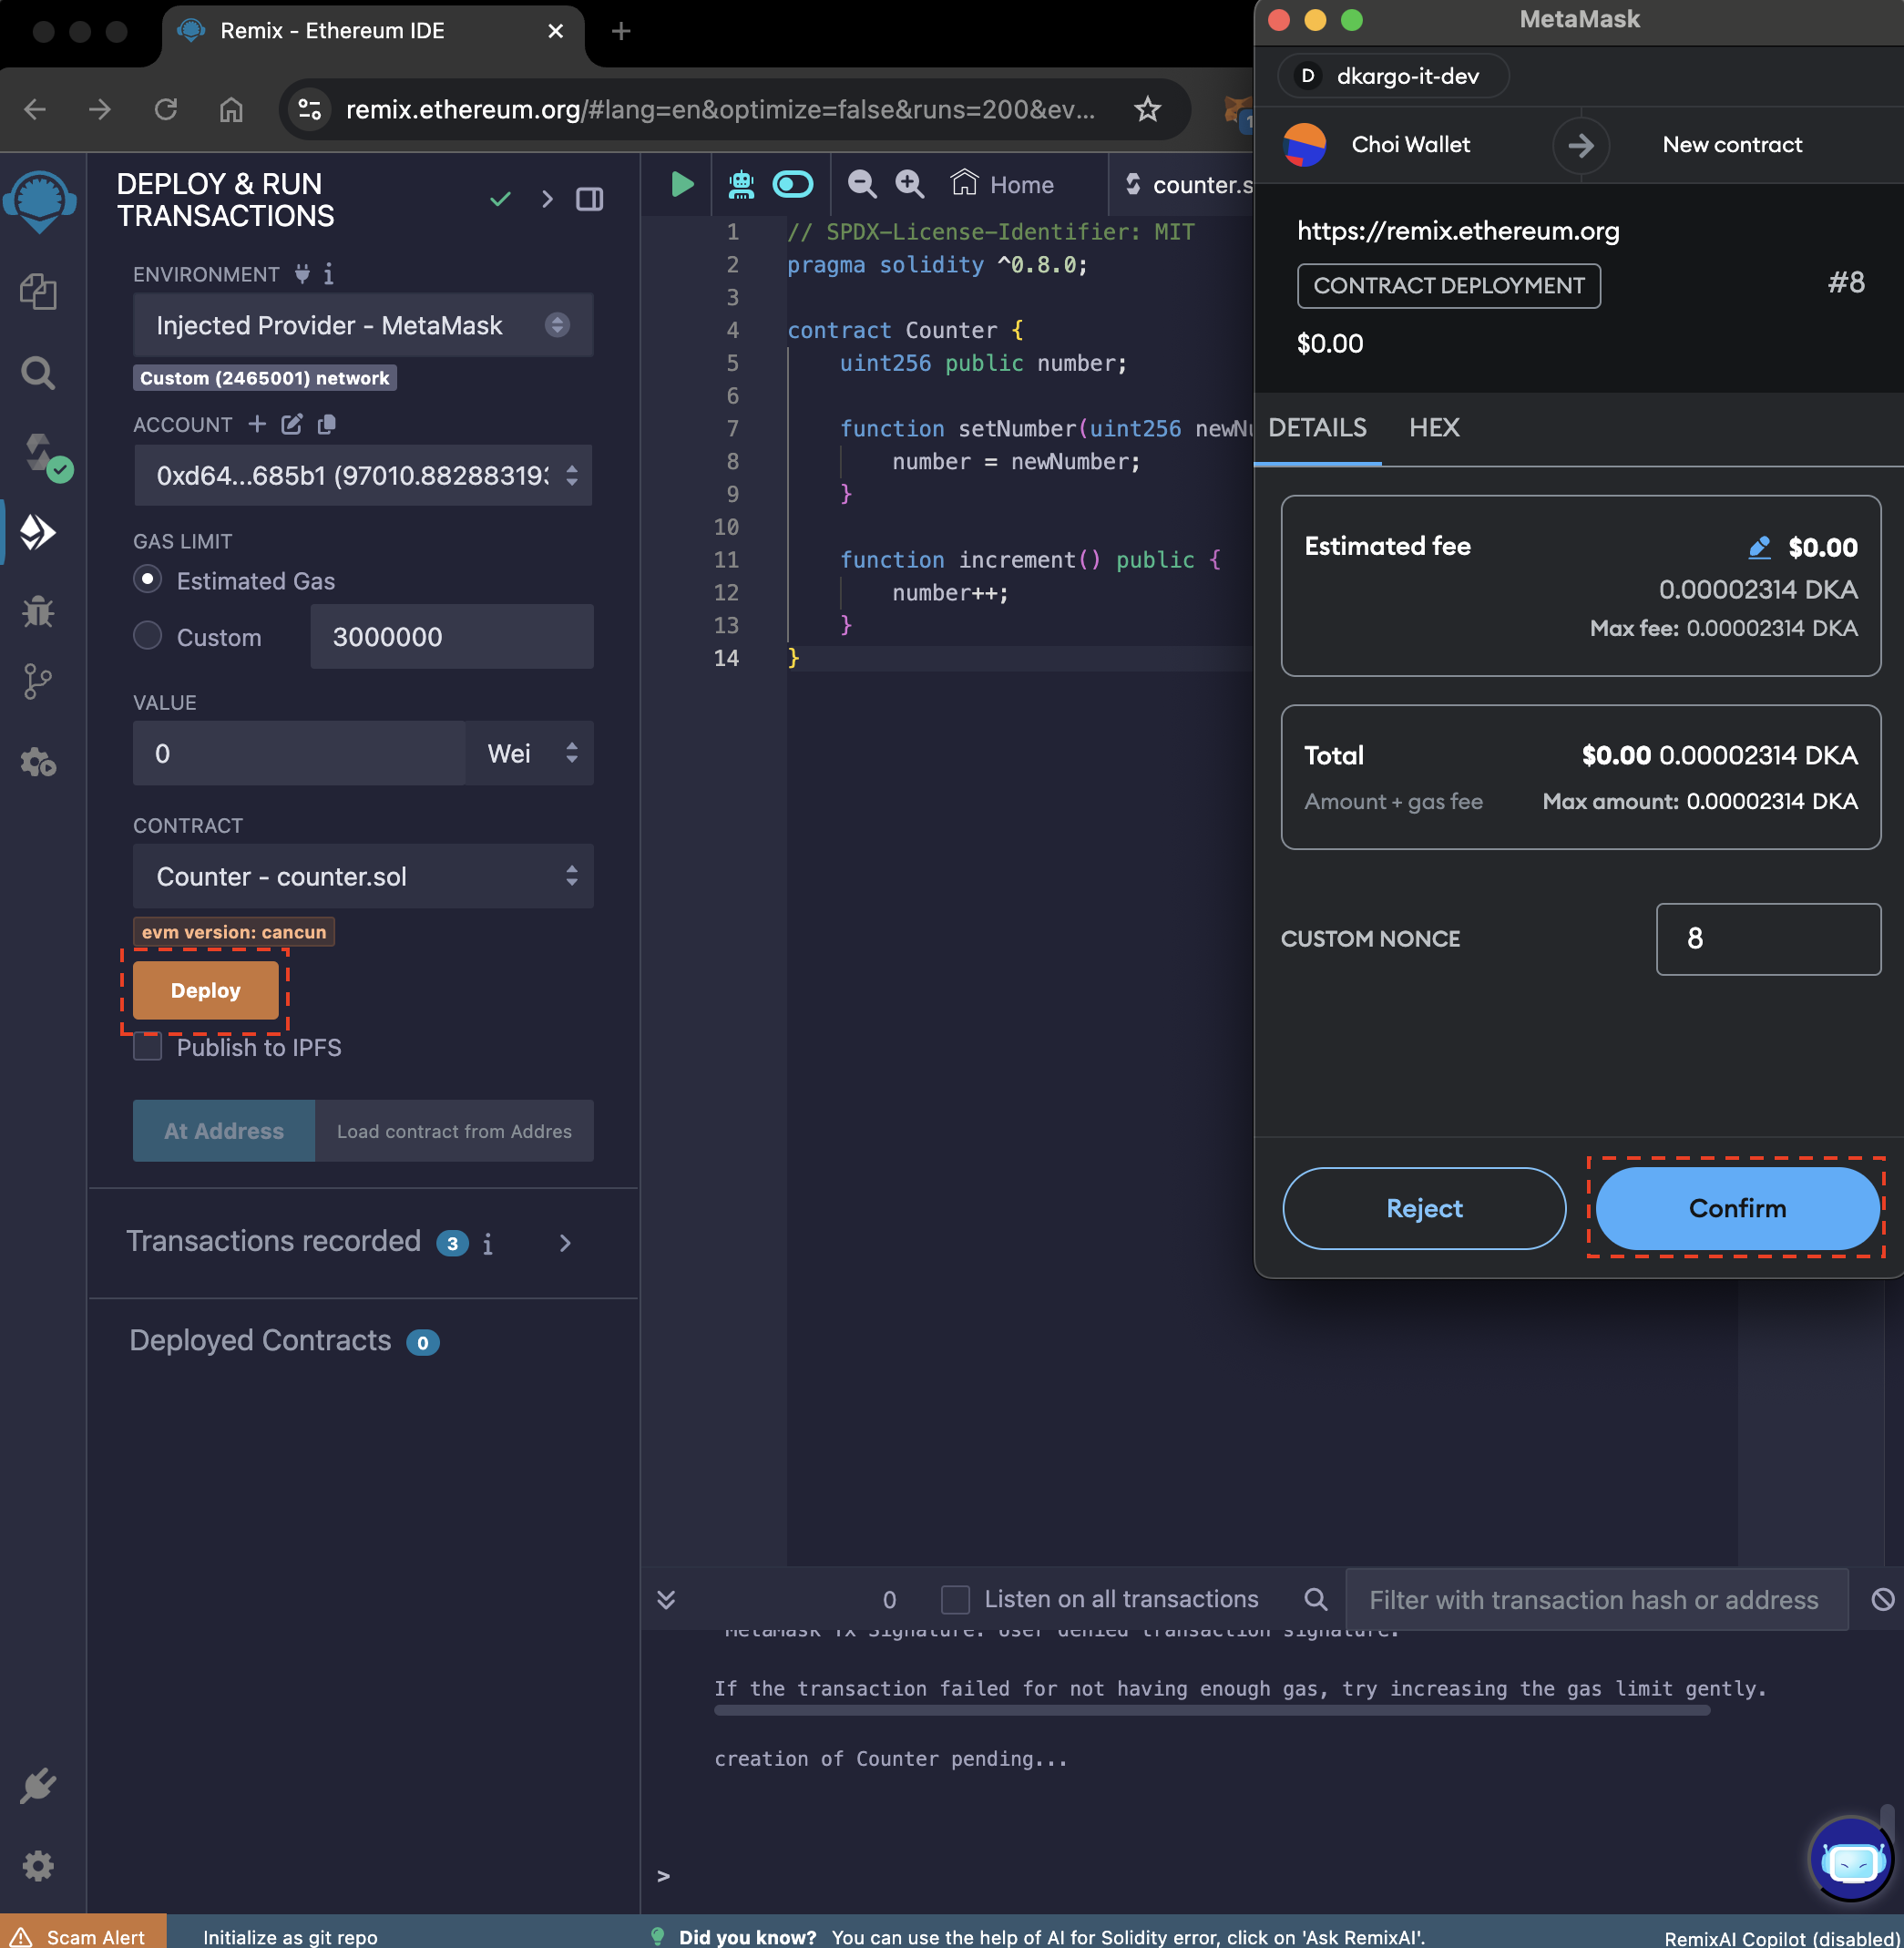
  1. Once MetaMask is connected, click the [ Deploy ] button to deploy the contract.

STEP 3 - Interacting with the Contract
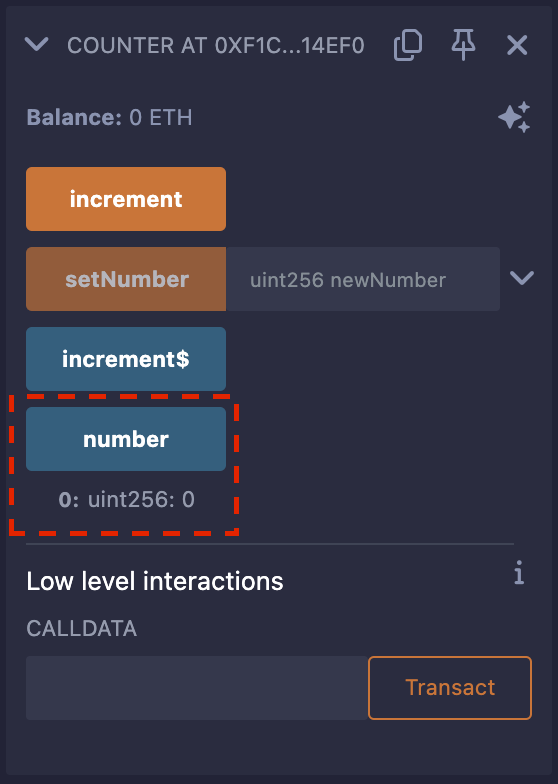
  1. After deploying the contract, interaction is available in the bottom-left tab of Remix.

  1. Click [ number ] to retrieve the stored number in the contract. The default value after deployment is 0.

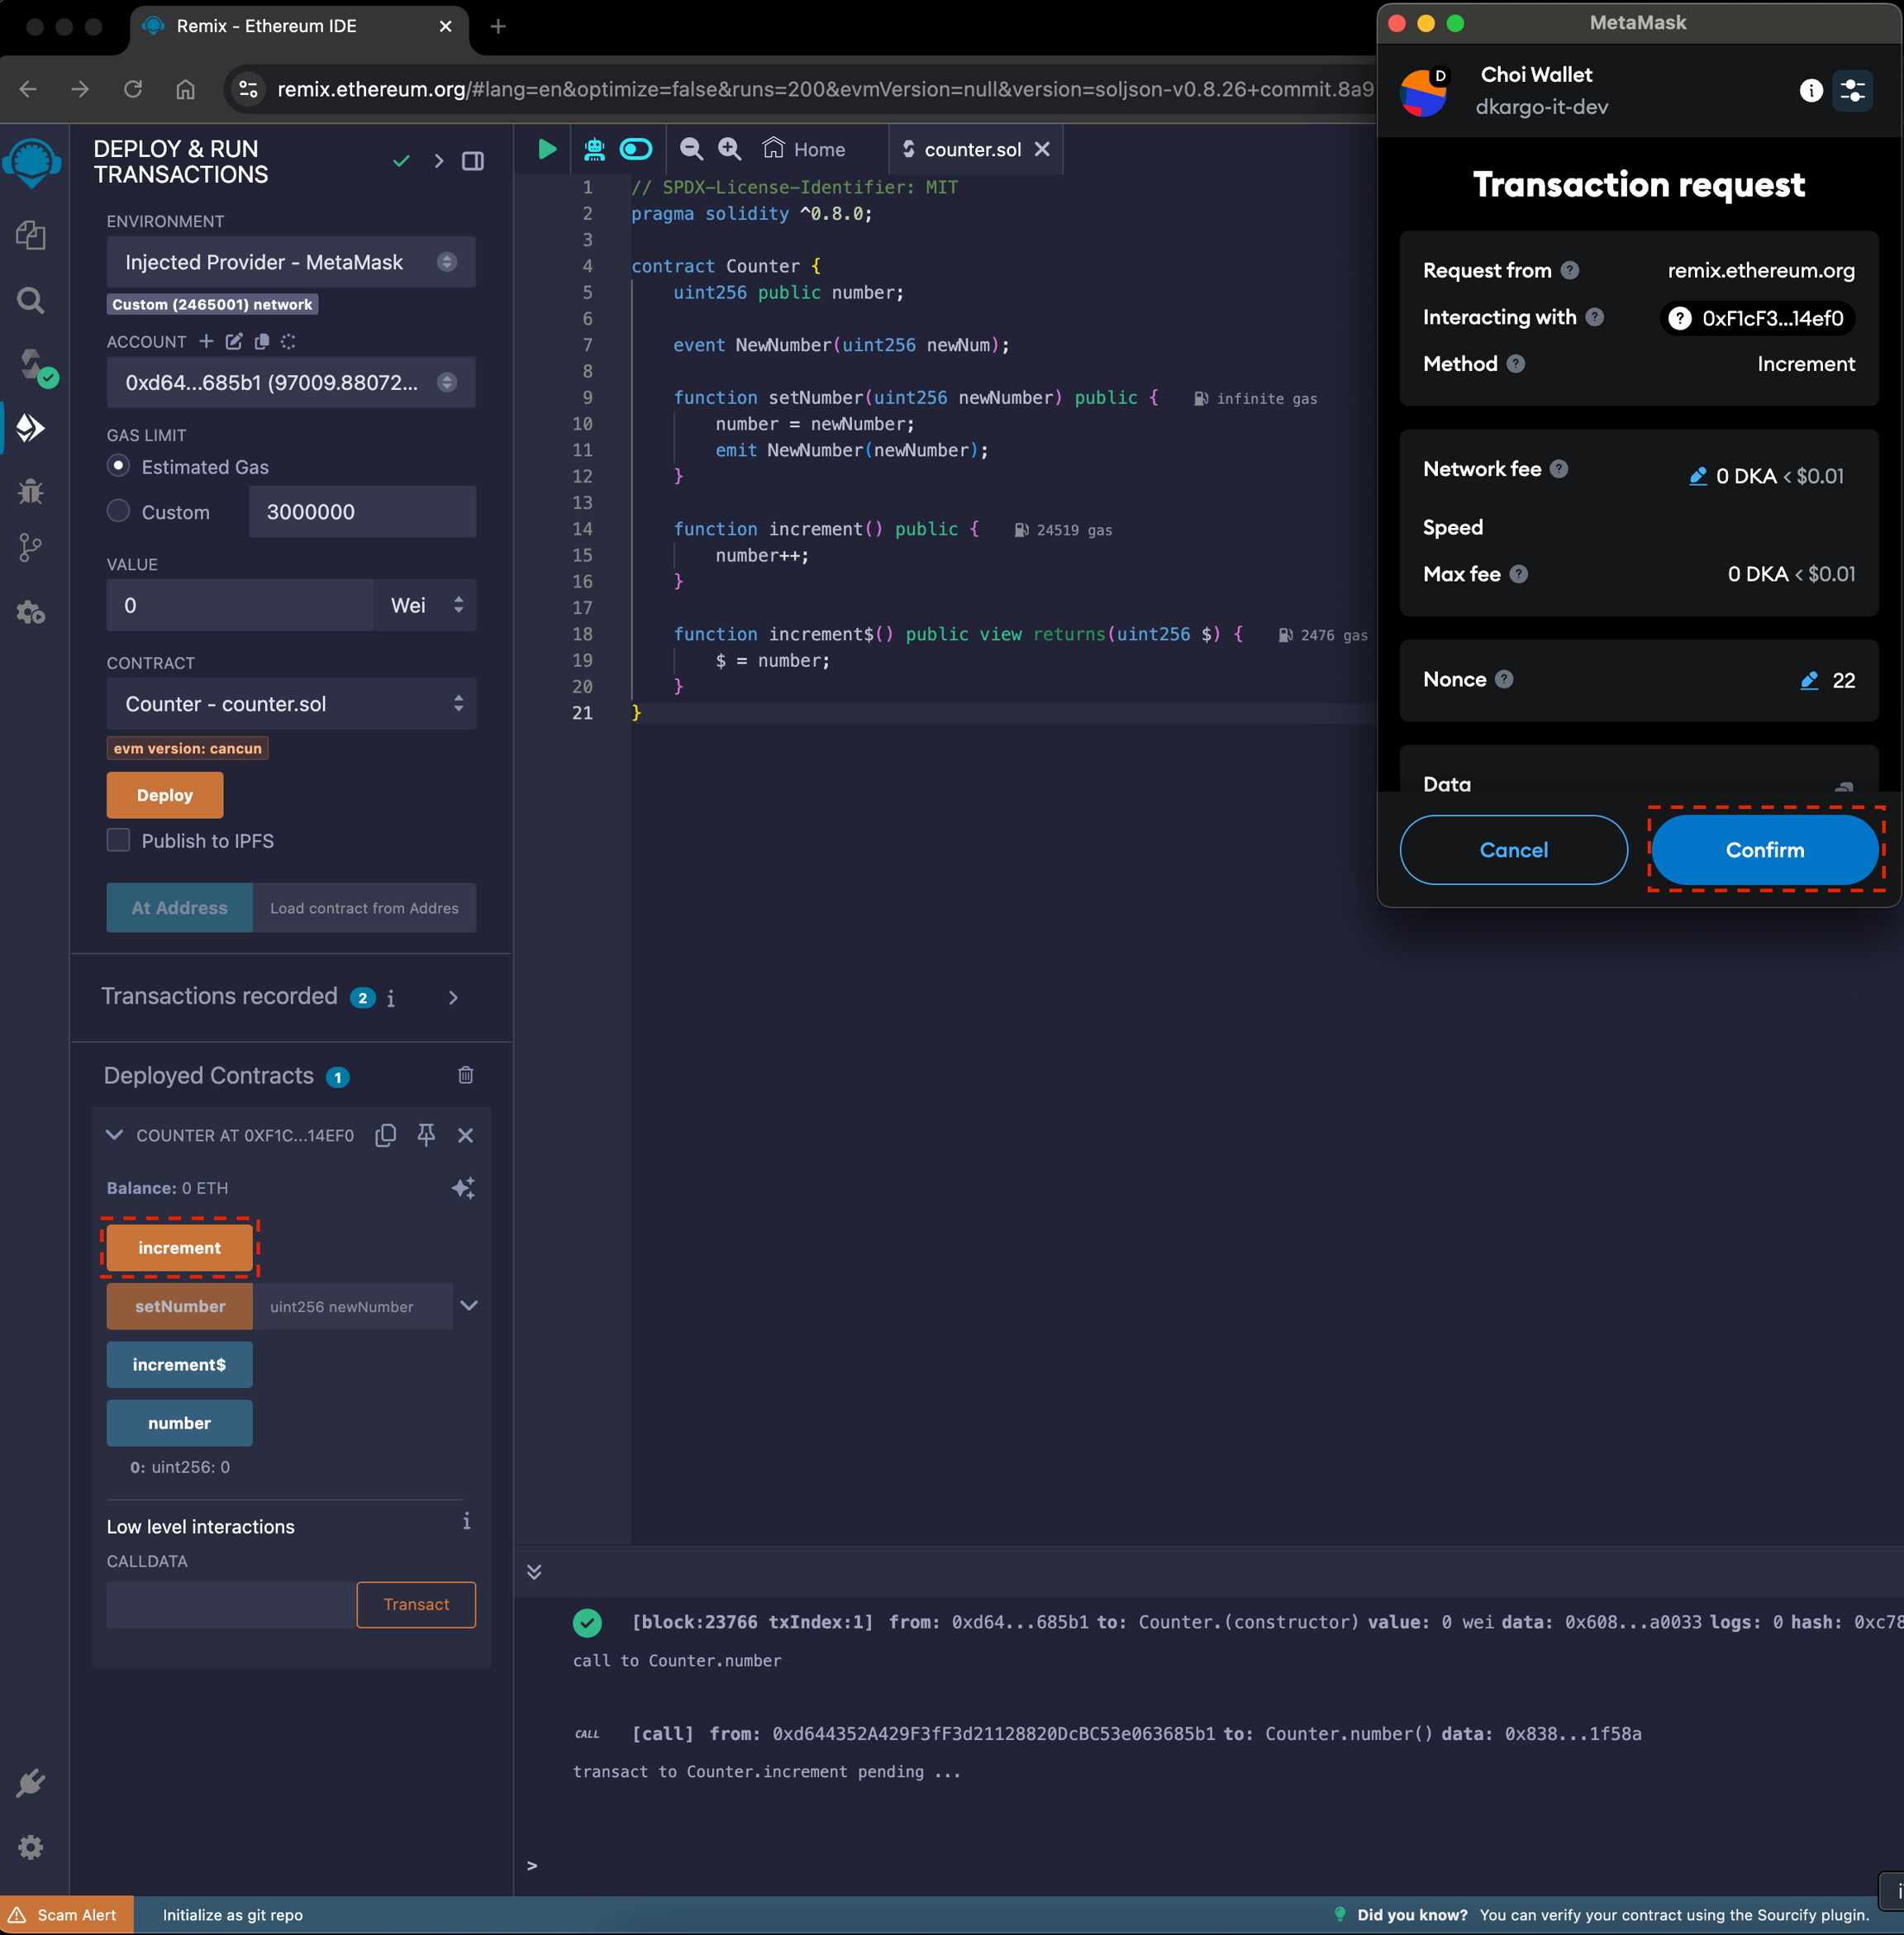
  1. Click [ increment ] to send a transaction that increases the number by +1. Confirm the transaction in MetaMask, which will then be sent to the dKargo Chain.

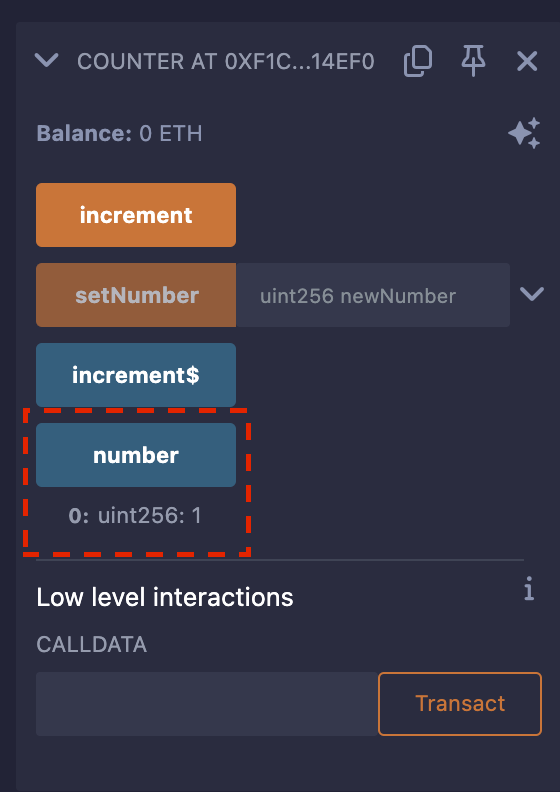
  1. Click [ number ] again to verify that the stored number has increased by 1.

The deployed contract can be verified in.

MetaMask
Remix
the Verified Contracts section of dScanner